How to Export Mailboxes to PST Files and Import PST Files to Mailboxes
There are numerous reasons why users may want to export mailboxes to, or import mailboxes from, PST files. You may want to move emails from one email account to another. Or even move Outlook mailbox data from one Windows or Mac based machine to another. Whatever the case may be, Over the course of this article, you will learn how to export Exchange Server 2010 SP1 mailboxes to PST files and import PST files to Exchange Server 2010 SP1 mailboxes.
In our environment, we have Exchange Server 2010 SP 1
installed on a server running on Windows Server 2008 R2 Enterprise
edition. We will use Exchange Management Shell for both the import and
the export.
Providing user rights for the Mailbox Export
A simple way to grant user rights for the mailbox export to the user (in our case the Administrator) for all mailboxes is to execute the below command in the Exchange Management Shell:
New-ManagementRoleAssignment –Role "Mailbox Import Export" –User Administrator

Alternatively, you can use the Exchange Management Console to provide full mailbox access rights.
Creating a network share for the Mailbox Export
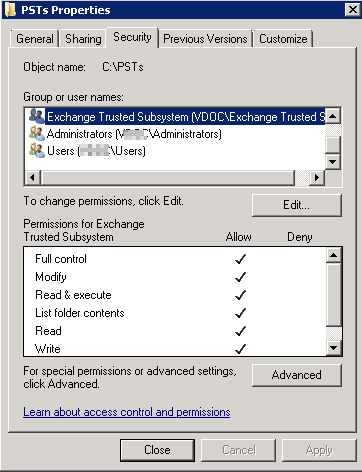
In the next step, a shared folder needs to be created that will be used as the file path for saving the exported PST files. Create a shared folder within which the ‘Exchange Trusted Subsystem’ group has read/write permissions.
Here, we have created a shared folder in the C:\PSTs with requisite permission:
Exporting a Single Mailbox to a PST file
After all the preliminary configurations are complete, you can use the ‘New-MailboxExportRequest’ cmdlet to start the mailbox export. The parameters used in this command are the file path where the file will be exported and the mailbox name to export. New-MailboxExportRequest -Mailbox <Mailbox_name> -FilePath \\Server_name\Folder\PST_Name.pst Replace “Mailbox_name” with the name of mailbox to be exported, “Server_name\Folder” with the path and name of shared folder and “PST_name” with the name of PST file to which mailbox is being exported.

Execute the following command to view the status of the Mailbox export request. Get-MailboxExportRequest

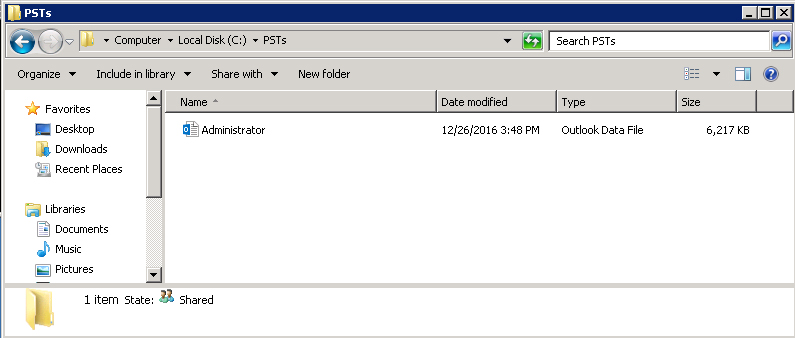
Once the status of the Mailbox Export shows “Completed”, the mailbox has been successfully exported to the PST file. The following figure shows the exported mailbox in the shared folder:
Exporting All Mailboxes to PSTs
Just as we saw in the case of a single mailbox, all mailboxes on the server can be exported using another command. To export all mailboxes present on the Exchange Server 2010 SP1 to a single shared folder (PSTs in our case), execute the following command: foreach ($i in (Get-Mailbox)) { New-MailboxExportRequest -Mailbox $i -FilePath "\\sp13-ex10\PSTs\$($i.Alias).pst" }

To see all completed mailbox export requests, execute the following command: Get-MailboxExportRequest | where {$_.status -eq "Completed"}
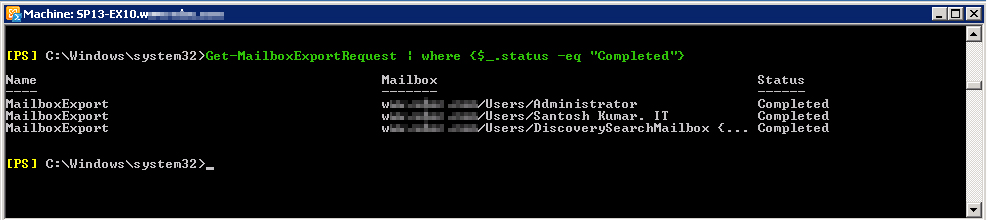
As we can see in the following image, all the three mailboxes present in our lab environment (Exchange Server 2010 SP1) have been exported to separate PSTs to the network share.
You may want to export a limited, pre-defined list of mailboxes. To
do this, create a CSV file (exports.csv) with the column “Alias” and
list all the mailboxes that are being exported in that column. Then,
using the Import-CSV cmdlet, we can use this CSV file to export the
targeted mailboxes:
foreach ($i in (Import-Csv .\exports.csv)) {
New-MailboxExportRequest -Mailbox $i.Alias -FilePath
"\\sp13-ex10\PSTs\$($i.Alias).pst" }
Removing Mailbox Export Requests
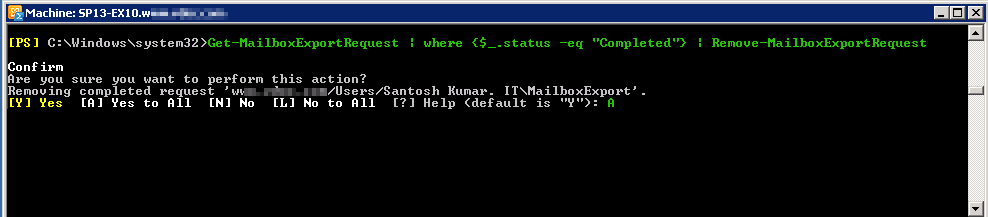
Once a mailbox export request is completed, it remains on the server until the administrator removes it manually using the Remove-MailboxExportRequest cmdlet. To clear all the completed mailbox export requests from the Exchange Server, execute the following command: Get-MailboxExportRequest | where {$_.status -eq "Completed"} | Remove-MailboxExportRequest When the Exchange Management Shell asks for confirmation, type “A” in the command line and press ”Enter” to remove all mailbox export requests from the server.
Importing PST Files to Mailboxes
Execute the following command to import a single mailbox from PST: New-MailboxImportRequest -FilePath \\Server_name\folder\PST_name.pst -Mailbox Mailbox_name In the above command, the -FilePath parameter takes the full path where the target PST has been kept, and the –Mailbox parameter takes the mailbox name into which the PST will be imported.

To see the status of the mailbox import request, use the following command: Get-MailboxImportRequest

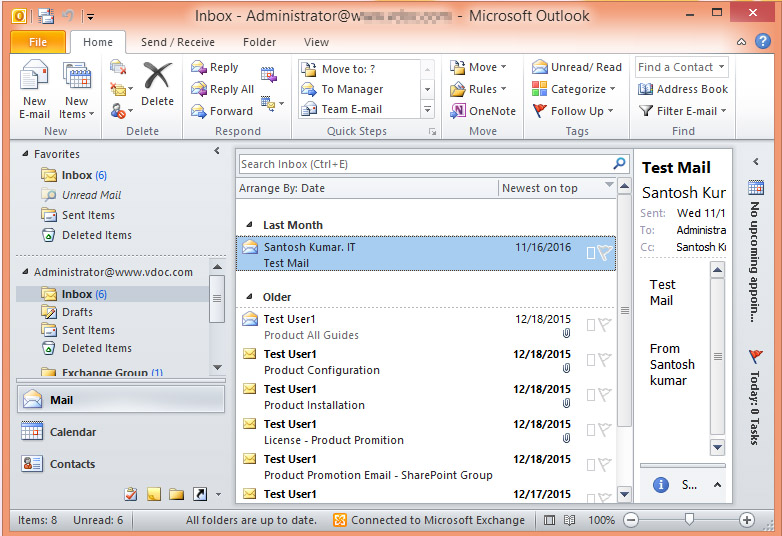
In the below image, the PST has been imported to Microsoft Outlook.
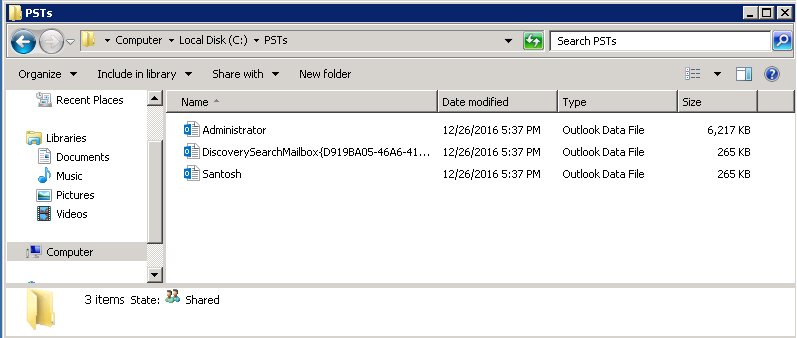
You are also able to import multiple PSTs stored in a shared folder. In the folder, each PST file is named after a corresponding user’s alias. The PowerShell command creates an import request for all PST files and imports them into the matching mailbox. The following command shows this process: Dir \\sp13-ex10\PSTs\*.pst | %{ New-MailboxImportRequest -Name RecoveredPST -BatchName Recovered -Mailbox $_.BaseName -FilePath $_.FullName -TargetRootFolder SubFolderInPrimary}

You can use the Get-MailboxImportRequest command to verify whether all mailboxes have been imported.
Removing Mailbox Import Requests
To clear all the completed mailbox import requests from the Exchange Server, execute the following command: Get-MailboxImportRequest | where {$_.status -eq "Completed"} | Remove-MailboxImportRequest When the Exchange Management Shell asks for confirmation, you have to type “A” in the command line and press the ”Enter” key to remove all mailbox import requests from the server.

Conclusion
By following the steps laid out in this article, single or multiple mailboxes in the Exchange Server can be exported to PST files, and single or multiple PST files can be imported to the mailboxes. However, there is a better way. If you want to simplify the migration, Exchange Recovery provides a cost-effective, GUI based mailbox recovery and mailbox export/import solution that may suit your needs.